
If you’re new to Xero or simply looking to update your invoice templates, this guide will walk you through the process step by step.
By the end of this article, you’ll have your bank details securely in place on all your Xero invoices, making it easier for your clients to pay you without any delays.
Let’s dive in!
Table of Contents
Step 1: Access the Invoice Settings
If you’re logged in to your Xero account, the first step is to access the settings where you can update your invoice template. Here’s how to do it:
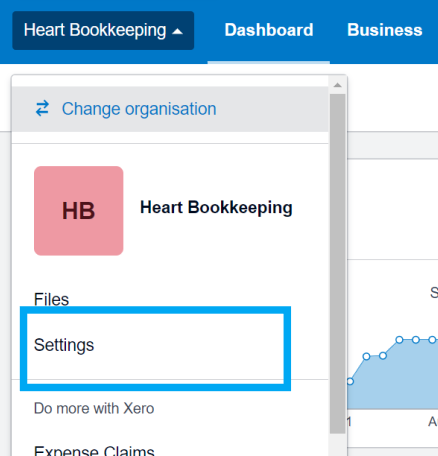
- Navigate to the Main Menu: On the Xero Dashboard, locate the main menu on the left-hand side of the screen by clicking on your organisation name. This menu is your gateway to all the features Xero offers.
- Click on ‘Settings’: From the main menu, scroll down and click on ‘Settings’. This will open a new page where you can manage various aspects of your Xero account.
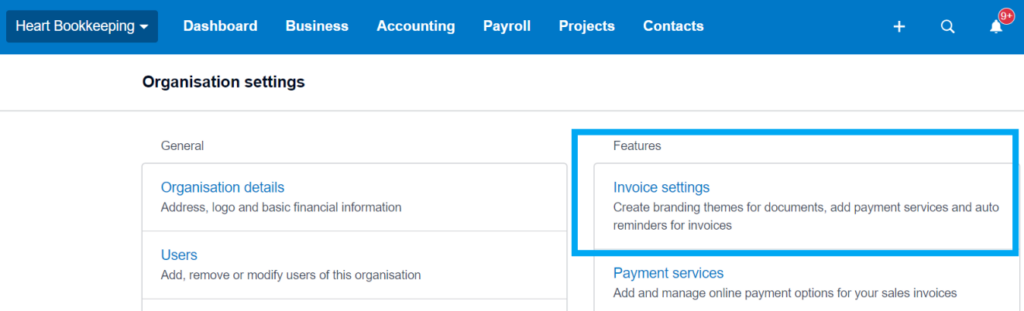
- Select ‘Invoice Settings’: Under the ‘Settings’ section, you’ll see several options. Look for ‘Invoice Settings’ and click on it. This is where you can customise your invoice templates, including adding your bank details.
You’re now in the right place to customise your invoice template and ensure that your bank details are included on every invoice you send out.
Step 2: Select Your Invoice Template
With the invoice settings open, the next step is to choose the invoice template you want to edit. Here’s how to do it:
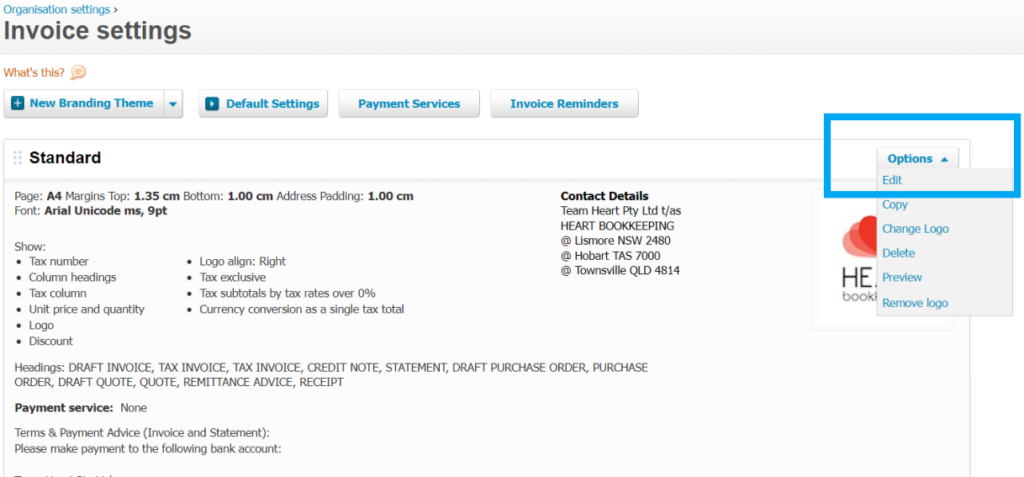
- View Existing Templates: In the ‘Invoice Settings’ section, you’ll see a list of your existing invoice templates. If you’ve previously created templates, they will be displayed here.
- Choose the Template to Edit: Click on the ‘Options’ button on the top left-hand corner of the invoice template you wish to update and then select ‘Edit’. If you don’t have a template set up yet, you can just use the ‘Standard’ template which is already set up with the basic layout and ready for you to customise for your business.
Step 3: Add Bank Details to the Template
Now that you’ve selected your invoice template, it’s time to add your bank details. This ensures that your clients know where to send payments, streamlining the process. Here’s how to do it:
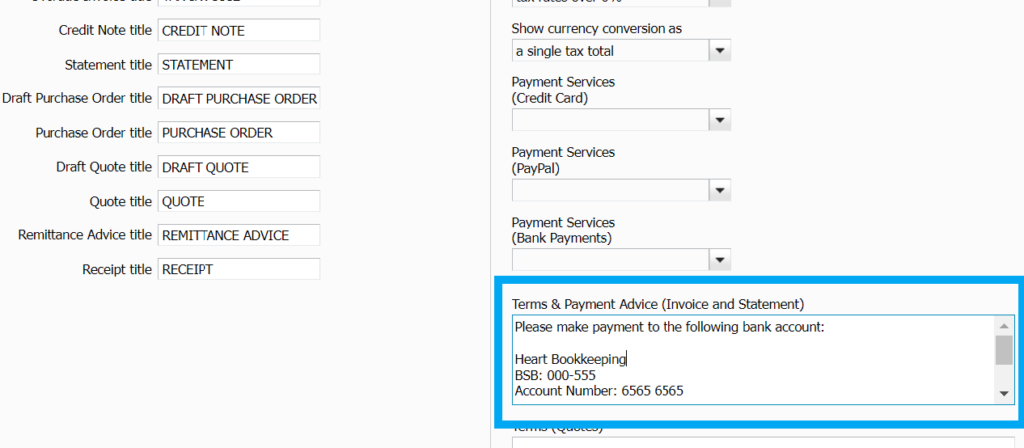
- Locate the Terms & Payment Advice Section: Within the invoice template, find the section designated for payment terms or payment instructions. This is typically where bank details are entered.
- Enter Your Bank Account Information:
- Bank Account Name: Input the name of your bank account as it appears in your banking records.
- BSB (Bank State Branch) Number: This is the 6-digit number that identifies your bank branch. It’s crucial to get this right, as it directs payments to the correct branch.
- Account Number: Enter your bank account number. Double-check this for accuracy to avoid any payment issues.
- Add Additional Payment Instructions (Optional): If you prefer, you can include additional instructions, such as “Please reference your invoice number when making payment” or any other instructions that may help you get paid faster and/or correctly identify the payment when it lands in your bank account.
- Check and Double Check your Bank Account Details: Before saving, carefully review the bank details you’ve entered. Accuracy is key, as incorrect bank details could delay payments or worse, mean that your money is paid to the wrong bank account and unable to be recovered.
- Save the Template: Scroll to the bottom of the screen in select ‘Save’
Step 4: Test the Invoice
With your bank details now saved in the template, it’s a good idea to create a test invoice to ensure everything appears correctly. Here’s how to do it:
- Create a New Invoice or select an Existing Invoice: To create a new invoice, from the Xero Dashboard, navigate to the ‘Sales’ or ‘Invoices’ section. Click on ‘New Invoice’ to start creating a test invoice OR select one of the invoices you’ve previously created.
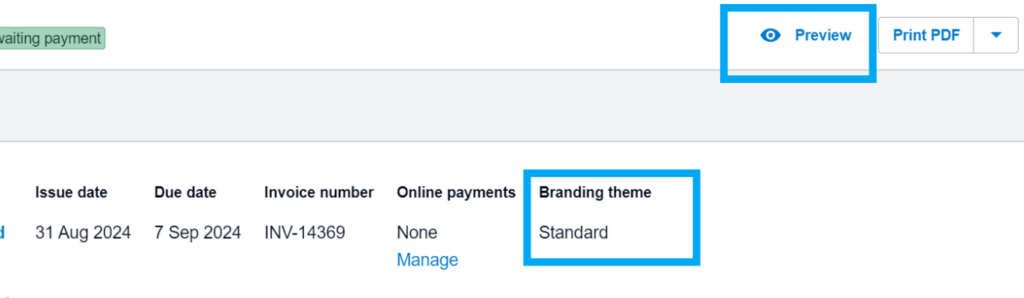
- Select the Edited Template: Ensure the ‘Branding theme’ is the same as the invoice template you’ve just edited.
- Preview the Invoice: Click on the ‘Preview’ button to see how the invoice looks with the bank details included. Make sure the bank details are correctly displayed in the payment section.
- Make Adjustments if Needed: If anything doesn’t look right, go back to the template settings, make the necessary adjustments, and save the template again.
Looking for UNLIMITED Xero support?
If you’re a small business owner who is struggling with the ins and outs of Xero, Heart Bookkeeping has you covered!
Our Xero Online Training gives you access to a comprehensive library of training videos, walking you through Xero’s features step by step.
The best part?
You’ll receive unlimited support from our Xero experts whenever you need it, ensuring you never feel lost or overwhelmed. Start your journey to mastering Xero with confidence and ease.
If bookkeeping just isn’t your thing and you want to get back to doing the things you love in your business, schedule your free discovery call today to speak to our team about how we can manage your bookkeeping.
If you’d prefer to speak with us directly, give us a call on 0434 811 819.