Paying superannuation is a critical part of running a business in Australia, and Xero makes it easier to stay compliant.
With Xero’s Auto Super feature, you can streamline the process and avoid any last-minute headaches.
This guide will walk you through the steps needed to pay super in Xero, ensuring your super is paid on time and you’re meeting your obligations as an employer.
Let’s dive in!
Table of Contents
Step 1: Ensure you’ve Added Superannuation Details for Employees
Before you can pay super, you need to ensure that all your employees have their Super Fund details entered into their Xero Payroll file. To do this:
1. Go to the “Payroll” menu, then select “Employees”
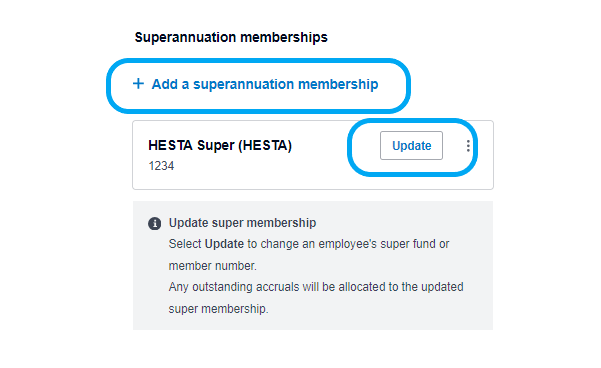
2.Click on the “Employment” tab and scroll to the bottom of the screen. Click “+ Add a superannuation membership” if the employee’s super details are missing or select “Update” if you need to update their details to a new fund, including entering the employee’s member number.

What if my employee’s superannuation fund isn’t listed in the drop-down list?
If your employee’s superannuation fund isn’t listed, this means the fund hasn’t been added to your Superannuation settings. You will first need to add the superannuation fund and then come back and repeat steps 1 and 2
3. Go to the “Payroll” menu, then select “Payroll Settings”
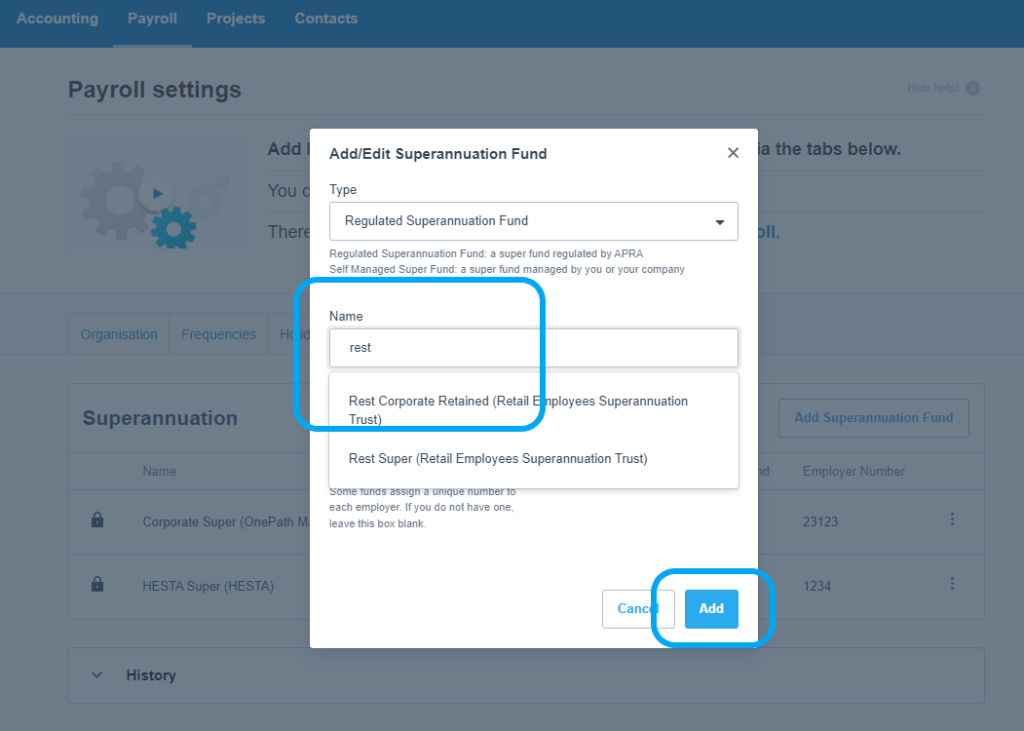
4. Navigate to the “Superannuation” tab and select “Add Superannuation Fund”
5. Search the employee’s super fund using the fund name or USI, or add a new fund by selecting the “Add” button. Please note the “Employer Number” box is not compulsory and is often left blank. You would generally only add your Employer Number if this superannuation fund is your company’s default superannuation fund.

Step 2: Enable Auto Super in Xero
To make super payments through Xero, you’ll need to enable Auto Super:
- Navigate to the “Payroll Settings” under the “Settings” menu.
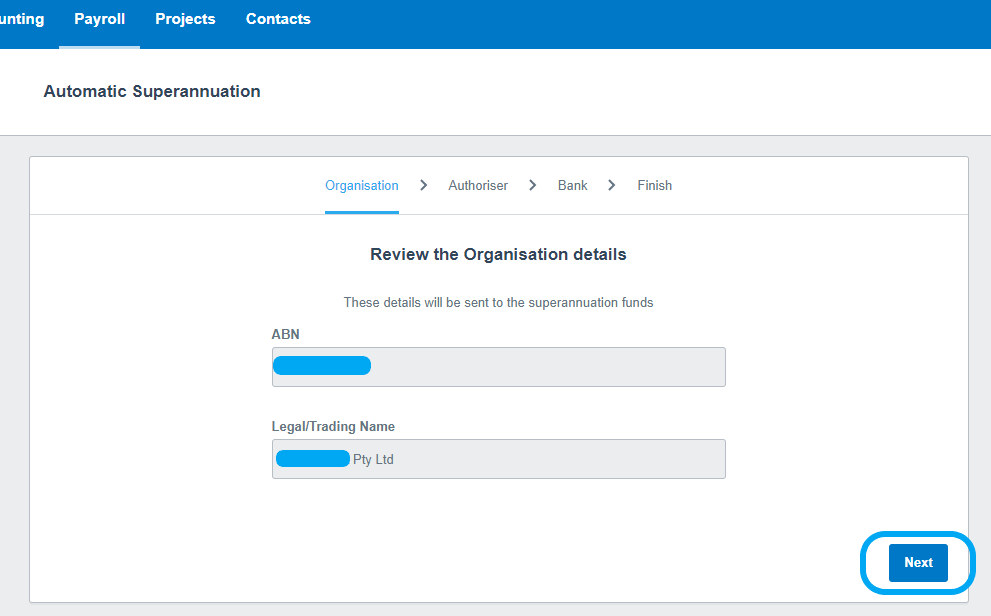
- Select “Auto Super” and click “Register.”
- Complete the registration form, including nominating the Super Approver, their mobile number (to receive an SMS authorization code) and the business bank account you wish the superannuation to be paid from.
Please note that once approved at Step 4, Xero will automatically deduct the super payable from your nominated bank account, usually within 24 hours, and distribute this and the required information, to your employee’s super fund.
No manual bank payment is required, streamlining the entire process.

Step 3: Submit Super Payments
Once you’ve assigned the super contributions, you can submit the payments through Auto Super:
- Navigate to the “Payroll” tab and select “Superannuation.”
- Review and select the super payments you want to pay. Tip: Xero will list the due date next to each payment to help you manage your super priorities.
- Click “Submit for Approval” at the bottom of the screen to begin the payment process.
After submission, Xero will send the Super Approver you set up in the last step an SMS code to approve the batch.
Step 4: Authorise Payments
To finalise the payment, you’ll need to authorise the superannuation contributions:
- After submitting the super payments, Xero will drop you back into the “Superannuation” tab in Payroll.
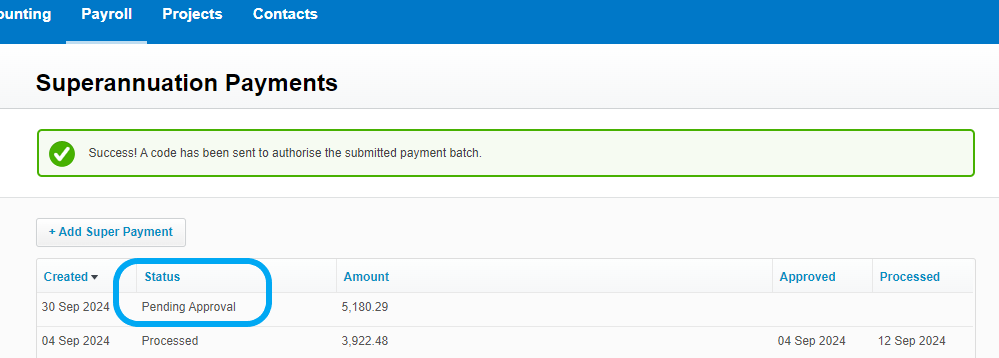
- Click on the super batch that shows as “Pending Approval”
- Follow the prompts to approve the payment using the SMS approval code you’ve received.
We recommend you authorise payments 10-14 days before the due date to ensure they are processed by your employee’s super fund before the due date.
Paying your employee’s superannuation late adds extra compliance obligations and costs to your business, including but not limited to:
- The requirement to prepare and lodge Superannuation Guarantee Charge Statements
- Administrative penalties
- Interest penalties
- Loss of tax deduction for late paid superannuation

Common Issues or Troubleshooting
If you encounter any issues while paying super in Xero, here are some common problems and solutions:
- Missing Super Fund Details: Refer back to Step 1, this means your employee’s super fund details haven’t been added to their “Employment” tab. If the employee hasn’t supplied superannuation fund details you can complete a Stapled Super Fund look-up on the ATO business portal.
- Failed Authorisation: Double-check your bank details and authorisation settings in Auto Super. Xero will send you an email or show a warning on the screen where a super batch submission has failed or super amounts have bounced back.
- Unprocessed Payments: Ensure you’ve completed Step 4 within Xero to finalise payment.
For persistent issues, we offer Xero training & UNLIMITED support to help you stay on top of your superannuation payments with ease.
You’re Now Ready to Pay Super in Xero Without the Stress
Paying super in Xero doesn’t have to be stressful.
By following these simple steps, you can ensure your super obligations are met accurately and on time.
If you need any extra support or training, Heart Bookkeeping is here to help.
As we mentioned above, we offer online Xero training & UNLIMITED support packages, giving you the confidence to handle your books without any hassle.
If you’d like to learn more about our bookkeeping services, schedule a FREE discovery call today, and let’s make managing your business finances easier together!


